Saturday, December 21, 2019

In the Shadow of a Promise Derailed*


Seven months ahead of the stock market crash of 1929, my grandparents and many Americans associated a phrase in one of Herbert Hoover's 1928 campaign of prosperity ads, "a chicken in every pot and a car in every backyard to boot." as a sign of a progressively upward trend for the economy. 

Granddaddy was a bricklayer and by '29 he had moved his little family with wife and two young boys from the country to the big city, following the building boom that soon fizzled with the crash. Granny became bread winner, taking in laundry, and sewing detailed baby smocks and pillowcases with tatted lace edges for those who could still afford frills.

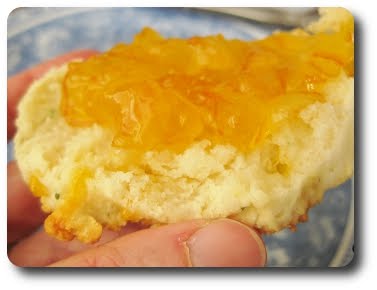
It was while living in the shadow of the promise derailed, they began enjoying "chicken sandwiches". The "chicken sandwiches" of which I speak were just biscuits, split, buttered and sprinkled with black pepper. I used to think my parents had lost their minds when they remembered and revived the "chicken sandwich" at our dinner table years later.

By the way, web research says Herbert Hoover never uttered those words, but that they were put out there by the party in campaign mode. So maybe the promise was never made by an individual, so much as by a group. Further, one site suggested another political "H" as the source of the "chicken in every pot" portion of the quote: Henry IV, 17th century beloved king of France is quoted as having wished his peasants might enjoy "a chicken in his pot every Sunday".

Does anyone else remember a Great Depression era food tradition? (Also, was our family the only one that did the "chicken sandwich"?) Meanwhile, pass the pepper, please. I got a "chicken sandwich" waiting on me here.


* This article first appeared in 2010 as part of my Allrecipes blog Chopsticks in the Kitchen.  Ultimately, when the  Allrecipes (AR) site was sold, the new owners removed all the contributing cooks' blogs.
 AR  remains a good place to search for recipes, but those of us who had "gathered" there to chat on the member exchange page and read and write blogs still miss the previous owners' format. Friendships were made...real ones. People actually met in homes, traveling across states to gather. International connections were made as well.  We prayed for one another during crisis, and rejoiced with one another in even the smallest successes. Some have continued to connect via FB. 

Tuesday, June 5, 2018

Out of Africa

It is so pretty, the taste is just a bonus!
     This recipe was shared with us by a friend who said it is original to Malawi, where it is often served, but only with chicken on special occasions. The pastor and his wife were coming for dinner, and that seemed special enough to me; so, chicken was added to the stewing tomatoes, celery and onions before seasoning all with curry and pepper. The final addition to the pot was cream, after which it was heated just to the edge of boiling.

     We serve this over rice. Of course, what makes the meal fun is choosing from a myriad of toppings. This time we had the following on hand:


  • Pineapple tidbits
  • Mandarin oranges
  • Bananas, chopped and dipped in Fruit Fresh
  • Apples, chopped and dipped in salt water bath
  • Carrots, shredded
  • Green peas
  • Baby red bell pepper slices
  • Peanuts
  • Flaked coconut
  • Spring onion, snipped
  • Yogurt (plain)
  • Thai sweet/hot sauce

Not pictured: peanuts, coconut, Thai hot sauce.

Tuesday, May 15, 2018

Roasted Spring Chicken with Quinoa

In my refrigerator was a roasted chicken breast from the night before. Rather than have chicken in the usual meat and two sides fashion, I decided to “springboard” a meal off of Publix Aprons meal card labeled “Spring Chicken with Quinoa”

In this surprisingly quick version, due in part to the leftover roasted chicken breast, I used the following ingredients:
    1/2 cup quinoa (prepared using 1/2 cup water and 1/2 cup chicken broth)
    1 T. Plus a bit more freshly squeezed lemon juice, added to quinoa after it had cooked
    About 1/2 cup frozen kale, prepared in microwave with 1/4 cup water 6 min on high
    Frozen baby green peas, corn, and fresh carrot bits... softened in microwave
    A snack-size red sweet pepper, spring onion, and partial stalk celery chopped
    Salt & pepper to taste
Now my fellow ate it all, but without comment. When asked he said it was “Ok.” Okay, then. We’ll see if I can get this on the rotation for whenever I have a spare roasted chicken breast ready for the picking.

Monday, July 24, 2017

Biscuits, Outside In


It was in a country community of cooks, as a young mom and "outsider", I got my real "insider" information for the how-to of soft, golden biscuits. I'm not blogging a recipe, but rather a biscuit making methodology that is pretty much (not entirely) universal. Which is to say, if you were to land on an inhabited planet in another galaxy, and there was biscuit making afoot (or a-claw, or a-tentacle....you get my drift), this is approximately the correct procedure. Besides, I have all these pictures and this blog space, right?

First gather your tools and ingredients. You'll need a bowl, a fork or spoon or mixing implement, measuring cups (both liquid and dry measure), optionally a scale [I prefer measuring shortening by weight], a flat pan, a hot oven, a clean floured surface for rolling or patting out the dough, biscuit cutter, flour, shortening, milk or buttermilk or yogurt, etc. etc. etc. Bottom line, get your stuff together.

Flour should be measured by dipping and then leveling with a straight edge. Here I'm using a dry measure cup and a chopstick, but a knife, the back side of a spatula, or any straight edge will do.
To the bowl of flour add your other dry ingredients. If you are using all purpose flour instead of self-rising, you'll need to add some kind of rising agent and salt.  Give that a stir to evenly distribute all. (Another excellent opportunity to use those ever-present chopsticks.)


Next you measure shortening to add to the flour mixture. If  you ever fooled with measuring shortening by the approved method of packing it into the dry measure cups, leveling and then trying to get it all back out of the measuring cup once done, you MIGHT want to consider measuring by weight instead. I find it much less of a mess. The ladies of my biscuit community did not measure at all! They would say, as my grandmother used to, 'Oh, you take shortening about the size of hen's egg.'. These are the same ladies who gave me driving directions telling me to take a certain road and "turn left where the Jones' farm used to be before the fire of [insert any past date ridiculously distant in time]", or would ask in alarm why I had not stopped at the intersection where no stop sign stood, but where one had previously, and "everyone knows to stop there, for goodness' sake."

Well, okay. Shortening measured, so add it to your dry ingredients and cut it in using a pastry blender, or knife, or shamoji (you know, the rice paddle thing you get with rice cookers for scooping out the rice...just down the road from where Tanaka san's noodles shop used to be....) until the flour/shortening mixture resembles (are you ready?) coarse cornmeal. Now I ask you? What does coarse cornmeal look like? I never knew, but was always being instructed to cut the shortening into the flour until it looked like that or like small peas. Now small peas, I could fathom, but it still seems to me that small peas are generally much larger than what I can only imagine coarse corn meal would be. So, I give you a picture complete with the shamoji as a frame of reference for size. ;o)
Before we go further, let me just say, I am aware that the shamoji is about as much help as the aforementioned missing traffic sign. Onward. To this mixture, using a fork, spoon, or chopsticks, gradually add your liquid , pushing the dough as it forms lightly to the side of the bowl. If the dough is too sticky, you may add just a bit more flour. You want it somewhat moist. Now transfer it to the clean floured surface and with floured hands pat it out til it is (readly?) "yay thick". I'm not sure what "yay" is but it seems to be whatever lies between a half and three quarters of an inch. If you do not have a biscuit cutter, a round glass dipped in flour can be used to cut out the biscuits and place onto a pan. You do not have to use oven paper; I did because I had added shredded cheese in the liquid/flour mixing stage. I also added some parsley flakes, but you do whatever your recipe calls for, or whatever modifications you are thinking sound good.

Now you slip them into the hot oven. My biscuit recipes all suggest 450 degrees F. for 10 to 12 minutes. Some folks like to brush melted butter on the biscuits as they come out of the oven. If, like me, you like crusts better than the soft inner bread, you might want to use a small 2 inch diameter cutter to make lots and lots of little biscuits. This will give you more crust, but also more opportunities for trying various toppings. Biscuits are so yummy topped with any of the following: jelly, syrup, butter, honey, sausage, fruit compote.


Oh! And one of my favorites: Orange Marmalade! The above biscuit was made using a Group Recipes submission by 247cook.

So, what do you like on your biscuits?

Thursday, July 13, 2017

A Refreshing Summer Salad

The recipe is copyrighted by Epicurious, so I won't list all that info here. I've provided a link to the page; I hope that it works for you (and for their lawyers.) 

This recipe comes from Epicurious, where it is listed as: Summer Squash and Red Quinoa Salad with Walnuts. As of this posting, 92% of the reviewers who answered the question, said they would make it again. I thought it was a bit work intensive on the front end for a side salad, but since it has protein rich quinoa and walnuts...as well as cheese, it could be served as a meal, at least at a ladies' luncheon in the heat of the summer months. My fellow likes to see some meat on the table, though. I should add that even with the front end work required, I was able to start prep for the full meal after four and had everything on the table by six.  So, I guess that just means I'm a lazy cook.
Made my quinoa first, and put in a shallow bowl
in the refrigerator to chill while I did the other
steps and rest of the meal.

As a side, it was really refreshing. There's lemon and lemon zest involved in the dressing, nice salty Parmesan for a garnish, some fresh basil leaves for another flavor boost. All in all, satisfying. Here it was well-received alongside meatballs and green beans. 

Would I make it again? Yes, I would. Did I tell them I would? No, I didn't.

Things done differently than the recipe: 

  • as some online comments suggested,  prepared the quinoa according to package directions
  • used tri-color quinoa, instead of red, only
  • omitted walnuts


Friday, July 7, 2017

Early Passage

These dishes were my heart's dream when I was too young to have them. I must have been terribly vocal in my wishes, but Mother knew I was not old enough to handle the responsibility of breakable dishes. Of her two daughters, I was the one whose dolls were loved to pieces...literally. I was as likely to be found with my brother sprawled on the living room carpet setting up battle scenarios with his army men as I was to be playing house. Somehow, though, after the holidays, I had the dishes and the beautiful blue box with the tiny hinged silver clasp. Each cup and saucer, every plate and most especially the teapot, creamer and sugar bowl had its own ingeniously designed pink cardboard nesting spot. I was enthralled and "ready or not," I had entered a new, "big girl" world; one that included ... breakable dishes. 

And that is the inspiration for this blog's name. Original header looked like:
Small print reads: "Family dishes, some breakable, some not...Some new and some old will grace this blogspot. A pinch of remembrances may also appear. Grab a cup; pour some tea; you're welcome here."

The "About Me" section of this blog is actually one written for my quilting blog, but I don't know how to split it and have one cooking one appear here and the other there.